Tuesday, October 30, 2018

Winter Woods

Winter Woods, another great tree set.  I love the edgelet in this set.  I hope just for that die that this set carries over.  Keep you fingers crossed.


Stamp trees on Very Vanilla with Crumb Cake. 


Die cut a piece of Crumb Cake and Early Espresso with the edgelet.  Stamp phrase and branch on Crumb Cake with Early Espresso.  Emboss the Very Vanilla and the Crumb Cake piece with Subtle Embossing folder.  Die Cut 2 trees out of Vellum.  Attach all layers and add a few Copper Sequin's.


Not your ordinary Christmas colors but it has a very warm Christmas feel to it.

Product List


Thanks for stopping by and if you have any questions please let me know.

Happy Stampin',
Debbie


Thursday, October 25, 2018

Joyous Noel Gift Card Holder

Today I wanted to share a gift card holder.  I am always trying to find new ways to give a gift card.  Sometimes I will alter boxes or bags I see on pinterest so that a gift card will fit in it.


It's so tiny and petite it's hard to believe that it actually holds a gift card.  But it does!


Take a piece of 4 1/2" x 8 1/4" Merry Merlot and score on the long side at 2', 4 1/4", 4 3/8" and 6 1/2".  On the short side score 1/2" and 4.  On both sides cut way the 1/2" strip down to the 6 1/2" mark.  Angel the ends on the tabs.  Burnish all folds.  Put Tear N Tape on the outside of the tabs and fold them in and then fold up to make the pocket.


Now you can decorate all the pieces and the Belly Band.  Here is a list of the bits and pieces to decorate.

5- 1 3/4" x 5" Whisper White
3- 1 1/2" x 3 Joyous Noel DSP
1 - 1 1/2" x 6" Whisper White
1 - 1 1/4" x 6 Joyous Noel DSP
Whisper White Scrap to punch tag and a couple snowflakes left over from another project.


Stamp the greeting and the snowflake in Merry Merlot and punch out with the Pretty Label Punch.  Sponge around the label with Merry Merlot.


Attach all Layers.  The back piece is the only one that does not have any layers on it.


I had a couple snowflakes left over from a previous project.  These were cut from the new Blizzard Thinlits Die out of the Joyous Noel Glimmer paper and Copper Foil.  I added a Pearl in the center.

Product List

As always thanks for stopping by and if you have any questions please let me know.

Happy Stampin',
Debbie

Shop Now!


Tuesday, October 23, 2018

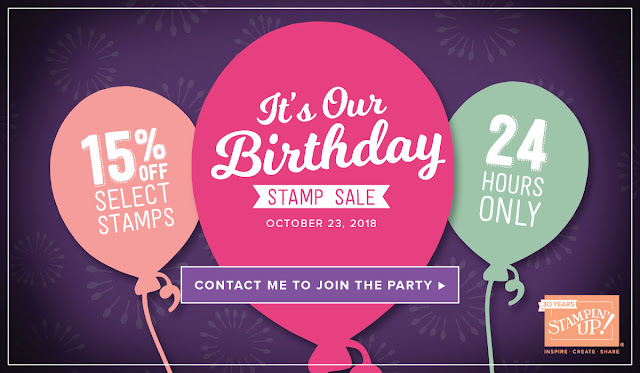
24 Hour Flash Sale.

Happy  30th Birthday Stampin' Up!!


https://su-media.s3.amazonaws.com/media/Promotions/NA/2018/Stamp%20Sale/10.01.18_FLYER_BirthdayStampSale_US.pdf

Today is Stampin' Up's 30th birthday!!  You can get 15% off selected stamp sets for 24 hours only!

Click here for the PDF list.  Also, don't forget to use the Hostess code Y6BRECDH.

Thanks for stopping by and let me know if you have any questions.

Happy Stampin',
Debbie

Shop Now


Thursday, October 18, 2018

Under The Mistletoe DSP

Today I have another card using DSP.  I had mentioned on my last post that I was really trying to use my DSP for cards also.


This is another really easy card that you could mass produce if you are one of those that sends out a lot of Holiday Cards.


Although it is hard to see it, I embossed the piece of Whisper White with the new Subtle Embossing Folder.  But... before you do that you need to die cut the circle out of the Whisper White.  Just make sure it's behind where your layers will go.  Now stamp greeting and run both pieces through the embossing folder.


Attach DSP to Old Olive and attach Real Red and Old Olive ribbon on top.  Now attach to Whisper White, and then to Real Red card base.  Die cut layering circle out of Real Red and attach to Whisper White.  Attach the circles with Dimensionals and add a Red Rhinestone.  See very simple!

Product List


Thanks for stopping by, and if you need a demonstrator, let me know.

Happy Stampin',
Debbie

Shop Now!


Tuesday, October 16, 2018

Joyous Noel DSP

Are you a DSP paper hoarder?  I usually buy the DSP for bags, boxes and 3-d item's.  I thought it was time to make some cards out of my DSP.  I used the beautiful Joyous Noel DSP.  It has the new Merry Merlot and Gray Granite in it, along with Copper and Silver.


This card is so easy to make and could easily be mass produced if you run out of time to get all those Holiday cards out.


I was very lucky with this card I had scraps left over from making a wreath (I will post that soon).  Cut 4 pieces of the DSP at 1 3/4" x 2 3/8" and attach to a piece of  Gray Granite cut at 4" x 5/ 1/4".  Attach all 4 leaving a small gap. Attach Merry Merlot/Copper Ribbon and then attach to Merry Merlot card base.


Stamp greeting on Whisper White with Merry Merlot and die cut Oval.  Die cut layering Oval out of Gray Granite.  Attach to card front with dimensionals.  Add a pearl and walah your finished.

Product List

Thanks for stopping by, and if you have any questions please let me know.

If you are looking for a demonstrator I am here for you, just let me know.

Happy Stampin',
Debbie

Shop Now!