Showing posts with label Christmas. Show all posts

Saturday, December 24, 2016

Merry Christmas

Just wanted to wish everyone a Merry Christmas!!


This was the last Christmas card I made for this year. 


A very simple card to make.  I needed to send out cards to my stamp club members & almost all the other cards I had we had made in classes, so I thought they needed something new.

Merry Christmas & Happy Holidays..

Happy Stampin',

Debbie


Sunday, December 11, 2016

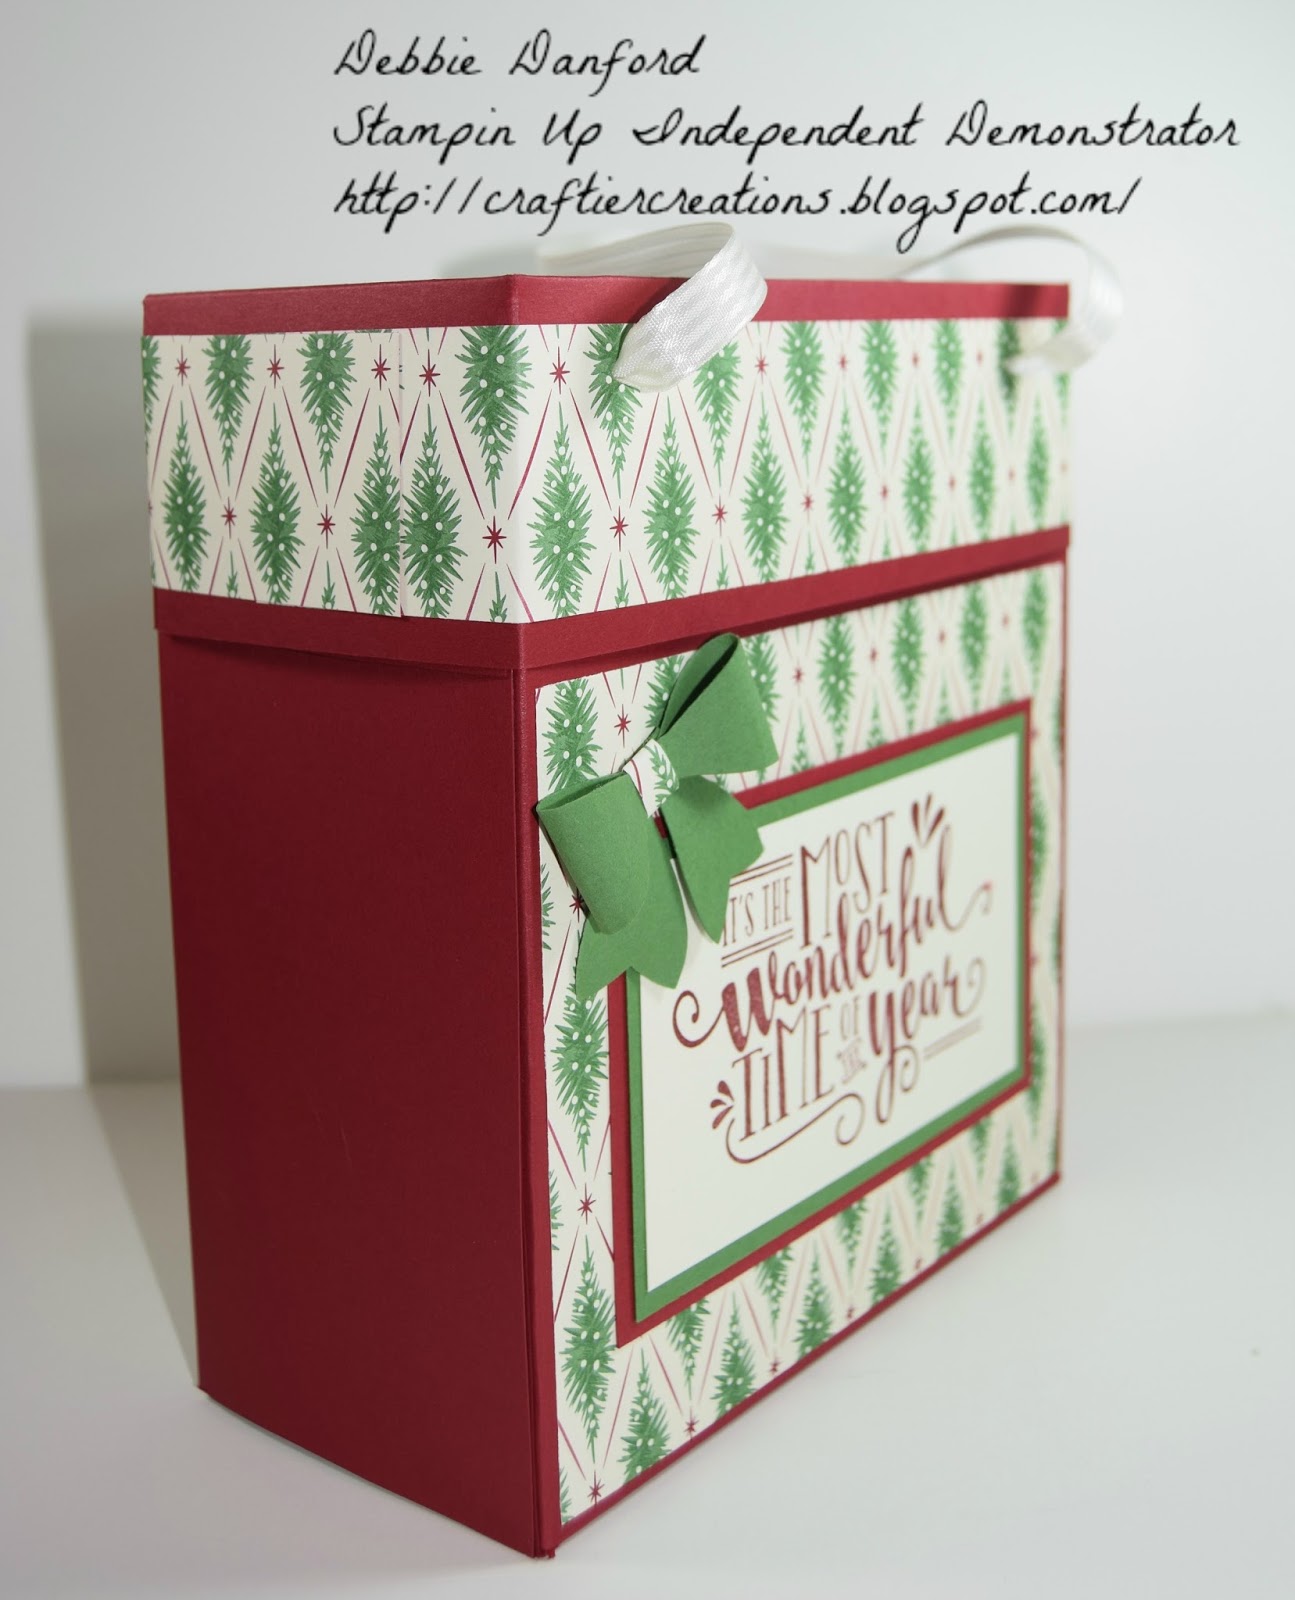
Christmas Bag

I am not sure where the time goes.  But, it sure seems like as soon as Thanksgiving comes & goes, the days just fly by.  I had good intentions of getting more posts done last week and it just didn't happen.

So today I am posting the large bag we made in the Tags, Bags & Gift Card class.  I have had this project on a shelf for over a year & finally got around to turning it into something.  Although it looks a little deceiving, it's actually very simple to make.  I got the idea for this project at craftycarolinecreates & she has a great video.  Thanks Caroline for the inspiration.

Now, most crafters have just been using DSP, which you can do.  I decided to use card stock & attach DSP to the front.  I felt it made the bag just a little sturdier.


 Score both 12 x 12 pieces on 2" & 9" rotate & score 3" & 9".  On 1 sheet cut away both squares as shown above.  Save these for later to use to make the bow. Burnish & fold all score lines. The 2' section is folded in the opposite direction.

On the other sheet with the 2" on the left cut up to the fold on both ends.  I glued a piece of cardboard, to the bottom.  The stuff that comes in the DSP 12 x 12 packs works great for this.  I always do a practice fold before putting adhesive on. I used Tear & Tape, but Tombo Glue or Fast Fuse will also work.  Now would also be a good time to add your DSP on the front & back.  It can be added after you make the box, but it is a little easier to do before hand. If you watch the video from Caroline, you will see that she tapes her 2' piece down.  I did mine a little different so when you put it together you can slide one flap on top of the other on the 2' piece.  It will make since as you are putting it together.

Card Board 2 7/8" x 5 7/8"
DSP 2 @ 5 1/4" x 5 1/2"
DSP 2 @ 1 1/2" x 8 1/4"
Cherry Cobbler 3" x 4 3/4"
Garden Green 2 3/4" x 4 1/2"
Very Vanilla 2 1/2" x 41/4"

Attach the DSP on the 2" top fold after you have the bag assembled. 

For the bow, I used the opposite color of the bag.  The square piece you cut out at the beginning works great for this.


Can't forget to decorate the back, & punch holes to feed the ribbon through.


Product List
Garden Green 12" x 12"" Card Stock"
[124278]
$5.95

Let me know if you have any questions.

Happy Stampin',

Debbie

Shop Now


Monday, December 5, 2016

Gift Card Holders

Last Saturday I had a Tags, Bags & Gift Card class, so I though I would share one of the projects we made.


 We made 2 tags, 1 out of Crumb Cake & 1 out of Real Red.


These have to be one of the simplest gift card holder to make.

3 x 8 1/2" piece of card stock
Score on the long side (8 1/2") @ 1 3/4" & @ 5 3/4"
DSP - 2 1/2" x 2 3/4" & 1 1/2" x 2 3/4"
Whisper White piece on inside 1 1/2" x 2 3/4"
Bell Band - 1" x 8 1/2"
Stamp & die cut tag & your done!


Product List

Hope to have the rest of the projects posted later this week.

Let me know if you have any questions.

Happy Stampin',
Debbie

Shop Now!!


Thursday, November 10, 2016

Merry Christmas Starlight

Well, today I am back with a Christmas card made with the new Star of Light stamp set & Starlight Thinlits Dies, & the stars from the Detailed Santa Thinlits Dies.

Die cut a few of the stars on the Shimmer paper.  Then stamp all the different stars with Smokey Slate, Cherry Cobbler, & Basic Grey.

Die cut the solid star out of Basic Grey & score the lines to get it to pop up a little.  Paint on Clear Wink of Stella & add a dimensional to pop up the star.  Stamp words & die cut ovals, add Enamel thread.


Product List

Hope you enjoyed.

Happy Stampin',
Debbie

Shop Now!!


Monday, October 31, 2016

Merry Medely

Hello Stampers,

Just a quick post with a card made using the Merry Medley background stamp.  It's such a versatile stamp.  Works well on it's own, or pair it up with something.  It's becomming one of my favaroits for this holiday season.

I have been wanting to do some experimenting with stamping on acetate for a while.  So...I finally did it.  I'm very pleased with how it turned out.

Stamp the Merry Medley on acetate with StazOn Ink.  I used glue dots to attach the acetate to the Whisper White.  I hid those with the star enamel dot, & behind the bakers twine.

Hope you enjoyed this cute & very simple card.

Product List


If you have any questions, please let me know.

Happy Stampin',
Debbie

Shop Now